boilerplate 유튜브 강의 시리즈
Blog ReactJS NodeJS#8 Register Function using Postman
1. cookie-parser 모듈 및 type definition 패키지 설치 (나중에 사용!)
npm i -S cookie-parser
npm i -D @types/cookie-parser
2. json, URL-encoded, cookie 형식의 본문을 파싱하기 위해 아래와 같이 추가
./src/server/index.ts
import express from 'express';
const app = express();
const port = 3000;
import mongoose from 'mongoose';

// 추가
import cookieParser from 'cookie-parser';

const uri = 'mongodb+srv://inseop:<password>@cluster0.v2bfu.mongodb.net/Cluster0?retryWrites=true&w=majority';

mongoose.connect(uri, { useNewUrlParser: true, useUnifiedTopology: true })
        .then(()=>console.log('DB connected'))
        .catch(err=>console.log(err));

// 아래 3줄 추가
app.use(express.json());
app.use(express.urlencoded({extended : true }));
app.use(cookieParser());

app.get('/', (req: express.Request, res: express.Response)=>{
    res.send('Hello World');
});

app.listen(port, ()=>{
    console.log(`app listening on port ${port}`);
})
3. 사용자 등록 요청 응답 작성
먼저 model의 user모듈을 불러와야하는데
상대 경로로 가져오면 '../../model/user' 와 같이 사용해야 한다.
가독성도 좋지 않고 헷갈리므로 tsconfig.json에
"paths": { "@model/*": ["model/*"]} 항목을 추가하여 @model/user와 같이 절대 경로를 접근할 수 있게 정의한다.
tsconfig.json
{
  "compilerOptions": {
    "target": "es6",
    "module": "commonjs",
    "allowJs": true,
    "outDir": "./dist",
    "strict": true,
    "moduleResolution": "node",
    "baseUrl": ".",
    "paths": { "@model/*": ["model/*"]},
    "esModuleInterop": true,
    "skipLibCheck": true,
    "forceConsistentCasingInFileNames": true
  },
  "include":[
  	"src/**/*"
  ]
}
하지만 tsc 명령어로 js로 compile된 후에는 절대 경로로 접근할 수 없다.
module-alias 모듈을 이용해 컴파일 된 js에서도 별칭을 사용할 수 있도록한다.
모듈 설치 후에
npm i -S module-alias
package.json에 _moduleAliases 부분을 추가한다.
  ...
  "scripts": {
    "start": "tsc && node dist"
  },
  "_moduleAliases": {
    "@model": "dist/model"
  },
  ...
마지막으로 프로젝트의 entry 파일인 index.ts의 맨 위에 아래 코드를 추가하면 된다.
import 'module-alias/register';
사용자 등록 POST 요청 응답을 작성한 index.ts
import 'module-alias/register';
import express from 'express';
const app = express();
const port = 3000;
import mongoose from 'mongoose';
import cookieParser from 'cookie-parser';
const uri = 'mongodb+srv://inseop:<password>@cluster0.v2bfu.mongodb.net/Cluster0?retryWrites=true&w=majority';

import {User, IUser} from '@model/user';

mongoose.connect(uri, { useCreateIndex: true, useNewUrlParser: true, useUnifiedTopology: true })
        .then(()=>console.log('DB connected'))
        .catch((err: Error)=>console.log(err));

app.use(express.json());
app.use(express.urlencoded({extended : true }));
app.use(cookieParser());

app.post('/api/users/register', (req: express.Request, res: express.Response)=>{
    const user: IUser = new User(req.body);

    user.save((err: Error, userData: IUser)=>{
        if(err) return res.json({success: false, err});
        return res.status(200).json({
            success:true
        });
    });
});

app.listen(port, ()=>{
    console.log(`app listening on port ${port}`);
})
4. postman 크롬 확장프로그램 설치
chrome 웹스토어에서 postman을 설치한다. 혹은 앱을 깔아도된다.
5. postman으로 POST 요청 테스트
아래처럼 요청이 오면 성공
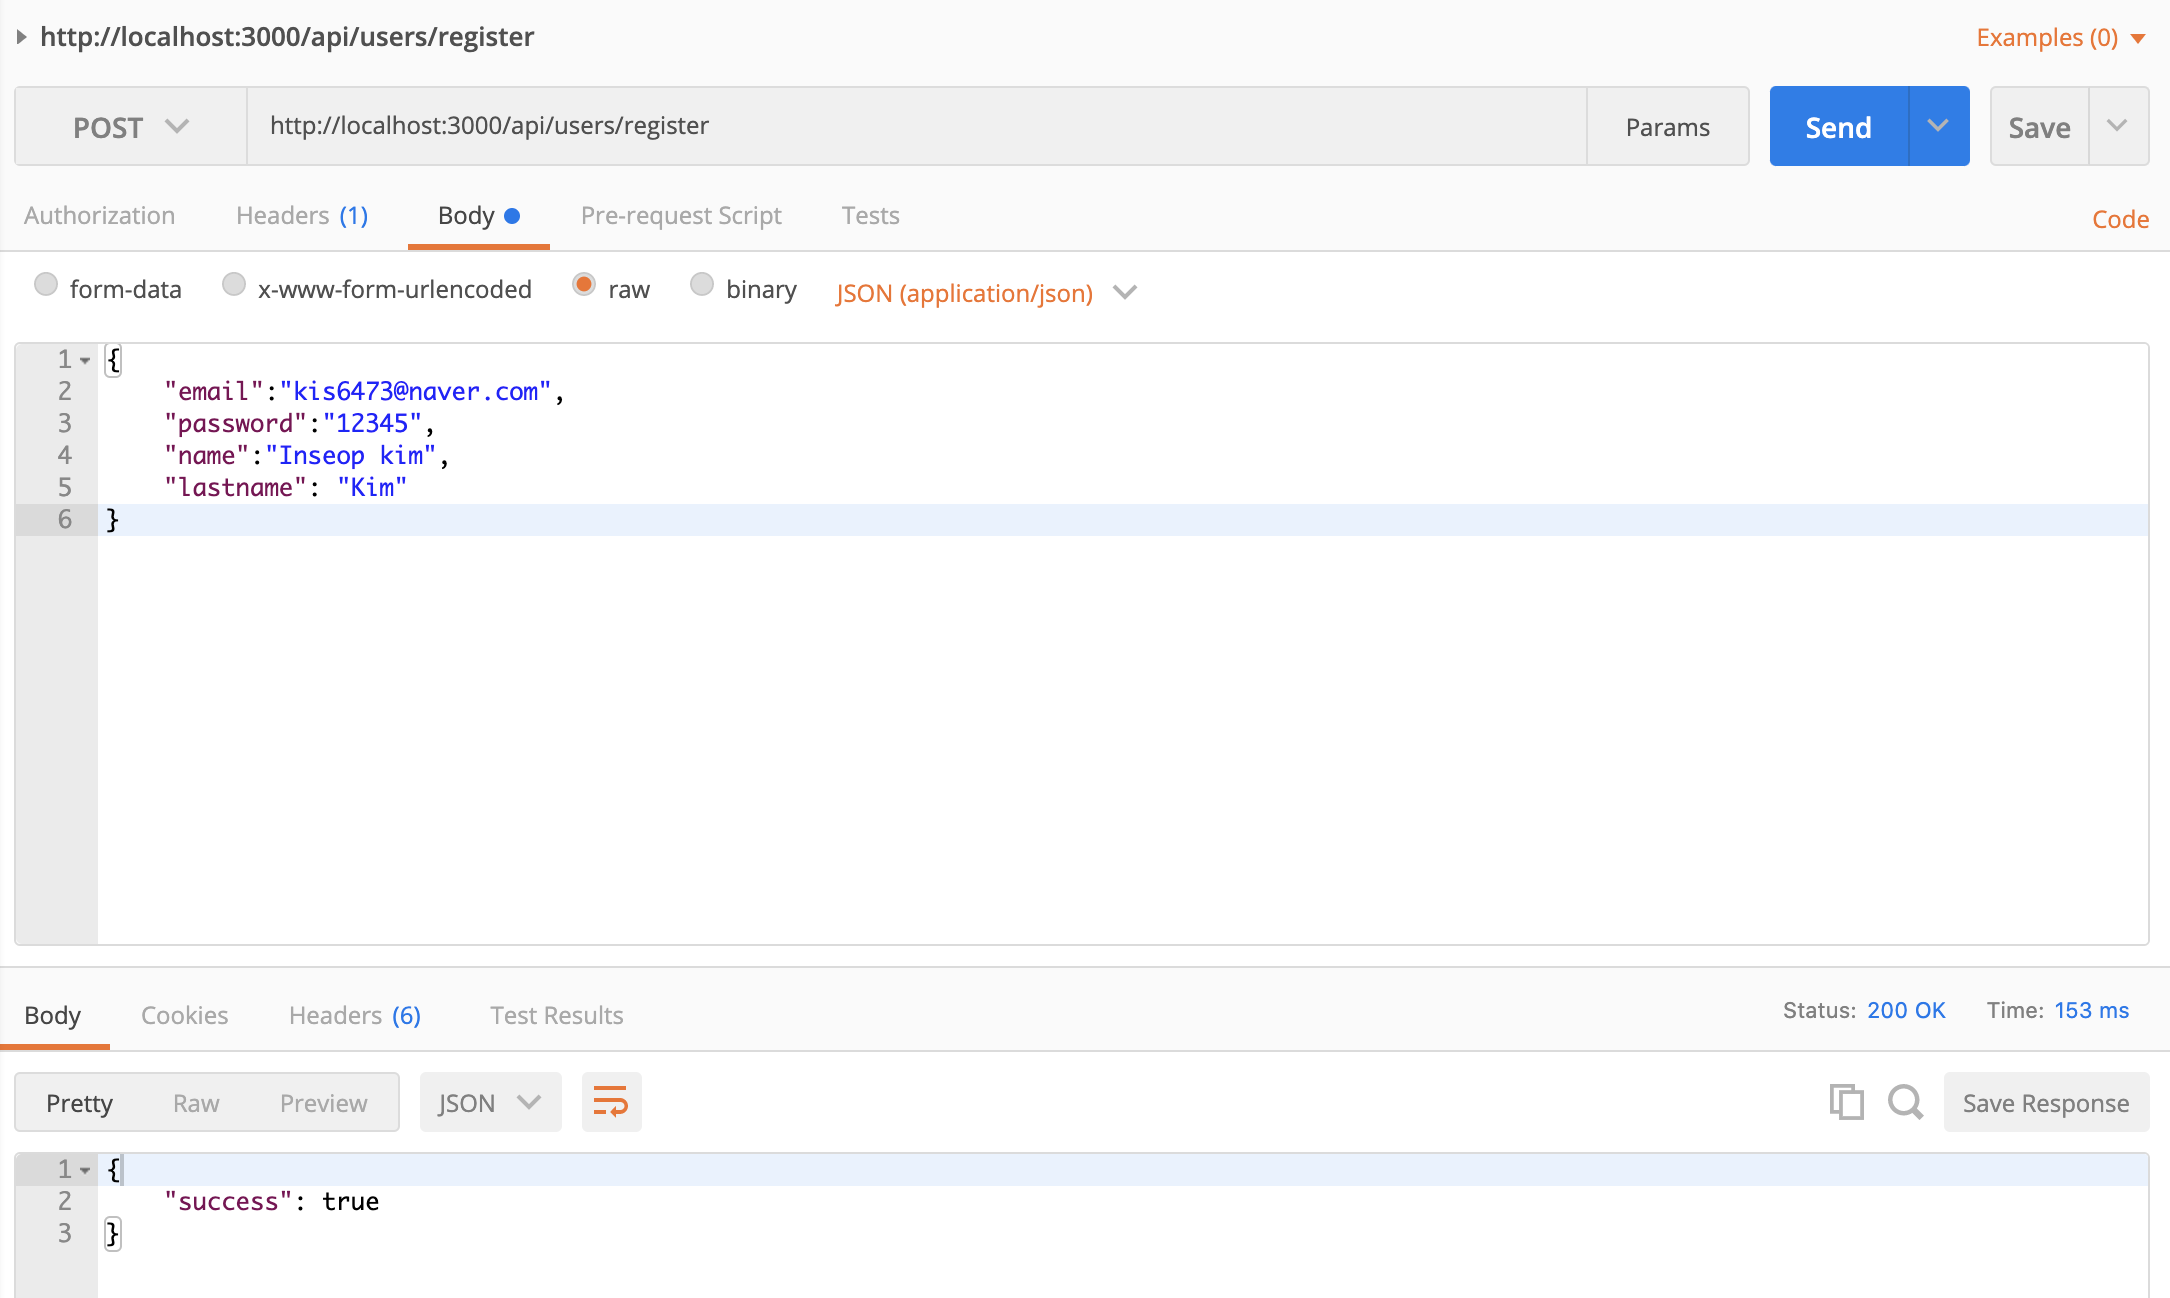
몽고 DB에도 잘 추가된 것을 확인할 수 있다.

'IT > 프로젝트' 카테고리의 다른 글
| 6. boilerplate - 보안 파일 with ENV file (0) | 2020.10.21 |
|---|---|
| 5. boilerplate - tsc-watch 설치 (0) | 2020.10.21 |
| 3. boilerplate - 사용자 모델 생성 (0) | 2020.10.20 |
| 2. boilerplate - 몽고DB에 연결 (0) | 2020.10.20 |
| 1. boilerplate - typescript 및 express 서버 세팅 (0) | 2020.10.20 |